#21: Lights and Cameras (3/17-18)
This has been a great, productive weekend. I set up the cameras & full-screen viewports to route the video to projectors, used them to create a handful of basic lighting looks and fine-tune the lighting systems, and tested blueprint programming to create a cue list.
Previously, I’d gotten the new, cleaned-up 3D model in a new, cleaned-up Unreal file and set up the lighting systems that I plan to use. I did all of that work inside the scene that was created to import the .fbx file of the wall, but plan to leave the cameras outside that scene to make it easier to get clean views in the viewports without the orange “selection” highlight.


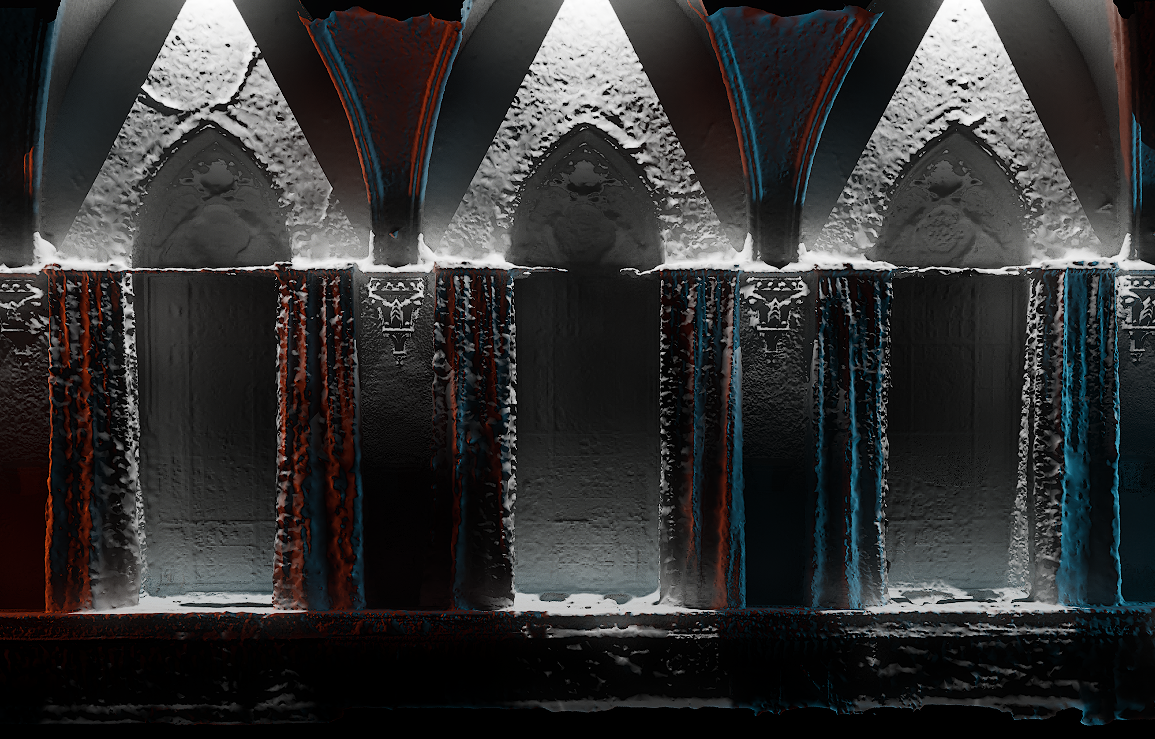
I set up 3 cameras – one face-on and one each at an angle from the left and right. I’ve also set up three new viewports on a second monitor, each ‘piloting’ one camera. The projectors will be at the left and right angles so that each projector fills in the ‘shadows’ where the other projector can’t hit, and the center camera lets me view the wall from the audiences perspective, and without the selection highlight.
The viewports have several useful settings to clean up the output – each one now has it’s toolbar hidden and both “Game Mode” & “Immersive Mode” toggled on. This isn’t quite perfect – there’s still a little menu icon in the top left corner, and while the viewport is piloting a camera, a fairly large “Pilot Actor…” label/button appears in the same area. Both need to be solved for a presentable, performance ready end product, but I’m happy to overlook for now and focus on the actual design & mapping.


The cameras have a ton of useful features (far more than I think I’ll need) and it’s very simple to set the aspect ratio and fov angle to match the projectors that I have access to. I’ve tested this with several lens options for the large, 12K lumen installation projectors I have access to at work, and the perfect lens optics fall right into the range for which we don’t actually own lenses. What we do have is either so wide, and would have to be so close to the wall that it won’t fill in all the detail in the architecture, or so narrow that it won’t cover the full width of the wall. I do have projectors myself with the right optics, but they’re not nearly as bright. The best solution I have right now is to focus only on a ~25’ chunk in the center of the wall, with the idea that a more-complicated, 4-projector setup could expand this to cover the whole wall. For now, the cameras are set up to match a pair of small portable projectors I can borrow from work to light the 3D model.
While I’ve got a much better system of controlling lights now that they’re sorted into folders, I’d love to be able to program each look I’m planning into a cue mapped to a keyboard key. I’ve taken a look at blueprint and some online guides and getting that functionality is basic and straightforward. Recording each cue might be a little complicated, but I’m not sure I’ll get that far. When running the “game,” these controls work absolutely perfectly… in only one viewport. Seems like a simple problem to solve, right? Sadly, no – it’s not hard to find other people online that have the same issue – apparently this is a feature of Unity, notably lacking in Unreal, and while there was a plugin to fix this, it was only in Unreal 4.
Faced with the options of migrating to Unity, migrating to Unreal 4, or just clicking the “visible” checkbox a bunch of times to set up the lighting looks like I’ve already been doing, I’ll stick with the last option. Long term, I’m sure there’s a way to get this all into something that will run with multiple full-screens and use blueprint as control but, again, right now I just want to make sure that this process will actually work.

Next up, I plan to have a working mockup using the scale model – everything is ready to go except the 3D print itself.